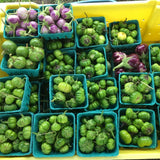
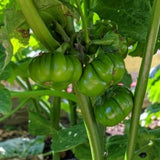
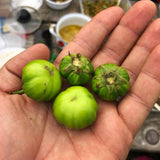
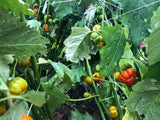
Green Pumpkin Eggplant (Ka)
Solanum aethiopicum var. Gilo
Please note: this listing is for SEEDS, not fresh eggplants!
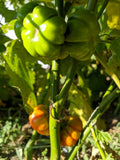
This is a small, bitter, pumpkin-shaped eggplant that our Karen farmer friends from Myanmar call Ka. It is eaten often and only when green; it turns orange when it ages to the point when the seeds have fully ripened. It’s also eaten as medicine for fevers or malaria. Of all the eggplants grown by our friends at Novick Family Farm in South Philadelphia, this one tastes most like their harvests back home in the mountainous villages of the Karen State of Myanmar. It is their favorite!
Known as: Green Pumpkin Eggplant, Ka, Garden Egg.
Days to maturity: 80-90
Seeds per pack: 40
Germination rate: 98% on 08/28/2025
Planting / harvesting notes
These are heat-loving and seeds should be started indoors about 1/8-1/4" deep, about 8 weeks before the last frost. Transplant into garden well after the danger of frost. The growing characteristics are similar to most eggplants. The plants reach about 4-5 feet tall and should be planted 12 inches apart. They need full sun and fertile soil. Staking helps as the plants become heavy. The eggplants begin green, but should be picked when they are about 2 inches wide and green. They must be picked regularly to keep production and ensure they don’t over ripen. For seed saving the fruits ripen to orange.
Seed keeping notes
Eggplants are generally self-pollinating, though we isolate different varieties of the same species by 300 feet, in hopes that flying insects will not cross pollinate them unexpectedly. Eggplant seeds are ripe when the fruits get far past their edible stage, and have turned another color, in this case orange. Cut the fruit, scrape out seeds (perhaps through a heavy-duty screen) into a vessel, add a little water (1-2" is probably plenty) to your seeds and pulp to keep them from drying out, and allow them to ferment away from direct sunlight. Alternatively, if you have lots of ripe fruits, stomp them in a bucket! Fermentation is not necessary with eggplants, but it makes seed cleaning a bit easier. Ideally, you will stir the concoction every day for 3-5 days. In the end, add more water to fill the vessel, stir one final time, and allow to settle. Pour off the floating material and then strain the seeds through a strainer. Sometimes, you will need to add more water and pour off the floating material several times until the water is clear and you can see the seeds sunken at the bottom. Squeeze dry the strained seeds in a towel, and then lay out to dry on a labeled screen or paper product in a ventilated place away from direct sunlight for a week or two.


